Photoshop Adjustments
Exposure
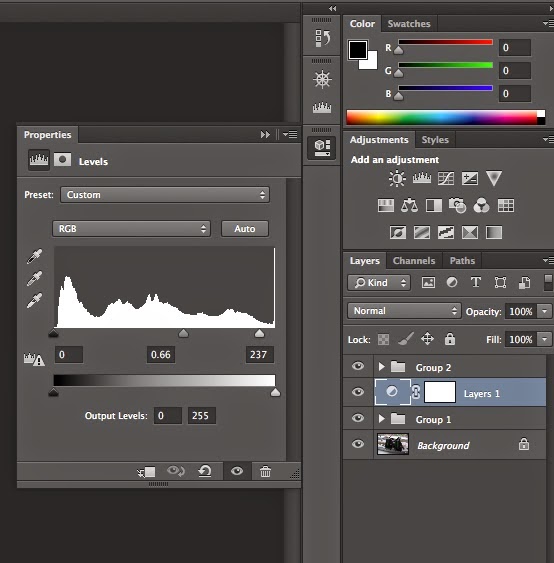
This photo here has been adjusted using photoshop layers, I clicked on new layers, adjustment layers and clicked on exposure and used the histogram to change the exposure levels.

Here is my histogram, it is perfectly exposed as I have a full tonal range because the black arrow is touching the end same as the white arrow. You will have to adjust the arrow if they are not touching the end to get the correct exposure.
Black and White
This is my photo before the adjustments.
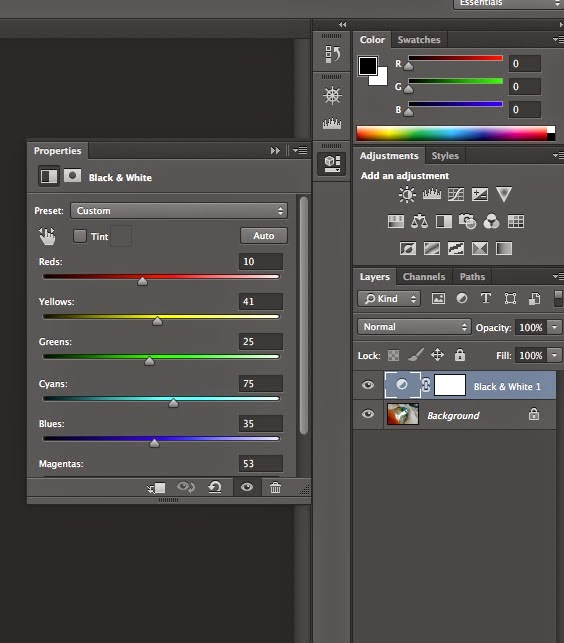
This photo here has been adjusted using photoshop layers, I clicked on new layers, clicked on black and white layers then I adjusted the property sliders to adjust the colours of it.

Here is the property sliders as you can see the different colours you can adjust, I played around with all of them to see the different colours and to see what came out best.
Selective Colouring
This is my photo before editing.
This is my photo after editing.
I used the paint brush to paint the image and select the colour I wanted in my image, as you can see i left the bottle.
Brightness and Contrast
This is my original image.
This is my image after editing with contrast at the highest value.
This is my image after editing with the contrast at the lowest value.
To adjust the contrast all you have to do is adjust the slider.
Cropping
This is my original image.
Here I have cropped it 9x6.
Here I have cropped it 1x1.


No comments:
Post a Comment